
First, they create a moody, somewhat scary (at least for small kids), environment with low lighting. This low lighting allows them a darker environment to allow more creative lighting, which is cool to look at, but really creates an issue for being able to shoot with faster shutter speeds to freeze the animatronics.
Prepare to spend hours in Lightroom or Aperture making adjustments to each shot, because each shot has its own unique lighting issues, which cannot be addressed with a simple White Balance adjustment.
While some are lit with green lights and some are lit with red lights, others are lit with a mix of red and blue lights. The colors are crazy and unnatural. They are cool looking visually, but they don't lend themselves to great photographs.
So how does one tackle low intensity and multiple colored lighting situations like this one?
Like I said; one image at a time. Treat each image separately. Sure it is a lot of work, but as you can see, it is worth it.
Let me address the shooting issue. Low light is not a photographer's friend to begin with. Low light that is lit by colored lights are even less friendly.

In opening the aperture, the photographer needs to make sure to get the key elements of the subject in focus. Opening the aperture, lower f/stop number, creates a shallower depth of field. In doing so, if the photographer were to focus on the dinosaur's nose, in the in the case of the triceratopa to the left, it's cheek, the photographer will lose focus on the eye, which is the key element.

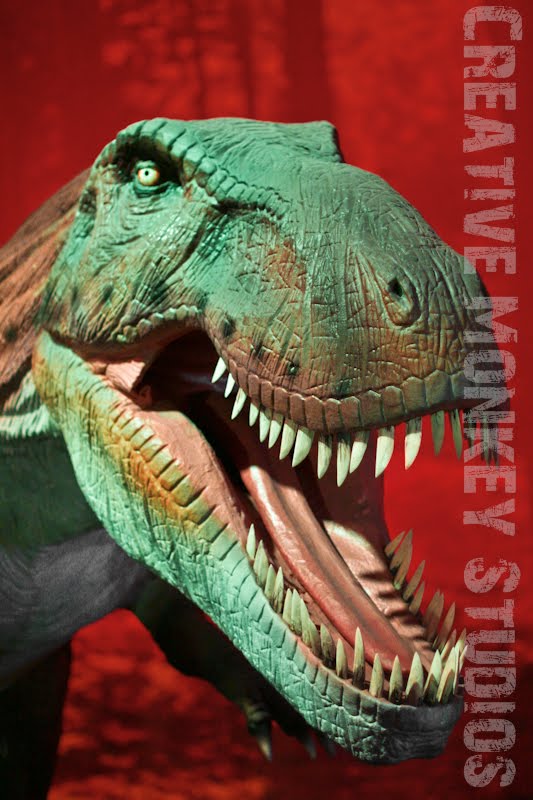
When looking at the dinosaur at the right, your eye is automatically drawn to its eye. But from there, because my choice of using a shallow depth of field, the viewer moves from the eye to the mouth.
The viewer's eye almost completely ignores the background, because it is not in focus.
So by opening the aperture to f/1.4 not only did I provide more light to sensor helping freeze the subject, I created a shallow depth of field allowing for natural movement through the image for the viewer.
But if I failed to get the focus locked onto the eye, this image would not have worked the way it does. So be careful when using a shallow depth of field because it is less forgiving for using auto-focus.

These Dinosaurs weren't too cooperative in posing. They were moving. In the shot on the left, I really wanted to get a shot that used the perspective of the scene to make it seem like the dinosaur was about to take a bite out of some one. Because I had to use an open aperture, the perspective effect I was going for was not as good, but allowed me to speed up the shutter to freeze not only the dinosaur, but the people in the background.

But ISO comes at a cost. Higher ISOs bring more noise. All of these images were shot at ISO 400 using my older Canon Rebel body. ISO 400 is the highest I can go with this body before noise becomes unmanageable.
Knowing your max ISO allows you to make sure that when you get home with those prize photos they are not spoiled by unmanageable noise. Let me explain the concept of Max ISO. While your camera may go a maximum ISO of 3200, at 3200 the noise is likely unmanageable; meaning you have reduce the noise in post processing to a point that the entire image loses its detail. So your max ISO might be several steps down, like ISO 800 or like in my case, 400. This is where you can manage the noise created by the higher ISO without removing too much detail from the image.

By doing do, in the image at the left, the viewer isn't distracted by the bright red background or the red highlights on the Tyrannosaurus brow and chin. The viewer is also not distracted by the blue lighting used to light the dinosaur in the foreground. Instead the viewer can focus on the details of the composition choice and details in the subject.

As the Oregon State Fair winds down and my hectic week comes to close, I find myself with a lot more photo smarts than I had the beginning. I learned a lot from the various presenters I viewed and I also taught myself quite a bit in the presentation I put together and presented as well.
Hopefully next year you will be able to join us at the fair and when you leave you will raise your photography out of the Jurassic Park and into the modern age. I know that while I have a long way to go still, I am closer to coming out of the park than I was a week ago and it is direct a result of my journey through the fair.