Showing posts with label People. Show all posts

Saturday, June 7, 2014

A Road Trip to Remember: The People

Rock Climbing Class

A recent road trip to Central Oregon allowed me a chance to not only connect with friends and photograph some beautiful landscapes, but also photograph some people, most of which were hanging/climbing 50 to 100 feet in the air on the face of Smith Rock.

While I myself do not climb, I have a mix of a great of respect and absolute confusion for those that do. For myself, I have a great dread of heights that is based on personal experiences in my past. My fear of heights is so bad, that when I get close to edge of something like Smith Rock, or lets say Crater Lake, it takes all my energy to not throw up.

But beyond that, the main reason I have never pursued rock climbing is that I lack confidence in my ability and in the safety of the gear to be successful in this particular endeavor. And in this particular case, if you are aren't successful, you are likely dead or possibly even worse, wishing you were dead.

With that said... enjoy the photos.

Reaching

Scaling Smith Rock Face

Example of Smith Rock Scale


Resting on the face of Smith Rock


Out of the Darkness on Smith Rock

Climber Explaining His Passion


Monday, February 20, 2012

Samples from the first 24 Scans

Okay... I am excited about this project, possibly overly excited, but what can I say. I have been waiting for years for this opportunity. So I thought that I was would share a sample of the first 24 scans. 24 scans that came from 1 of 6 tubs of these glass plates, and this tub isn't even the fullest of the tubs. I plan on scanning and converting one tub of these plates a weekend.

So here are the samples from the first pass...

Lanscapes:

People:

Flowers:

Flowers_1_of_1
Farms:


Monday, January 9, 2012

My World - A view of the world how I see it

Last weekend was fantastic from a creative point of view. Exhausting and fantastic all at the same time. Starting with the Kitty shoot Saturday at the Willamette Humane Society, moving into a planning session for my photo group's workshops. It was a long and rewarding start to a weekend. 

Grady

Then Sunday came early, 5:00 AM to be exact to prepare for winter shoot at a local park.

20120108-untitled_panorama1
Then Sunday afternoon came and it was time for the shoot with Nathan Smith of SmithFineArt.com. Pardon the raw look to this, it is merely a first draft; the final will look super-d-duper.

20120108-_dsc5886-edit
After the shoot with Nathan I hung out while a couple of other photographers spent some time shooting him. While they did their thing, I assisted with lights and shot some background plates.

20120108-_dsc6033and8more-edit
Once I got back home, I began editing. Until my student came over for the weekly mentoring session. Yup... that's right. I am mentoring a person for the year. Helping guide this individual to discovering their true potential and find their path to creative enlightment. This will be an annual project with a new student each year. So far it is going swimmingly, although after the assignments I handed out this week, this individual might not feel the same way.

I did more creatively this weekend than I did over the entire summer (June to August). It feels great, but I am exhausted and ready for some sleep.

Thursday, November 25, 2010

I Am Thankful

Since I don't want to embarrass my friends, I will only thank them without photos, but my family doesn't get such special treatment. Here are the five things I am thankful for today, in photos:


My Camera Shy, But Loving Wife

My Baby Girl


Yummy Food


My Oldest


My Youngest
I am thankful for these things and all my supportive, caring and giving friends. Without this network of people, I would not be where I am today. Thank you.


Monday, October 18, 2010

Photogeddon - Day 22: Photographer Animation and much More

In an effort to experiment with DSLR animation, my good friend Chris David requested me to shoot a sequence shot of him. I wasn't sure exactly why he was asking for it or what he would do once the camera was snapping, but I am always game for a little experimentation, so I shot about 11 frames of him doing exactly what you see below. Because of the size of the file, 3.05MB, it may take a few seconds to load, but it is a cool result... so wait for it. 

Wait for it....
I used Adobe Photoshop CS3 to generate the animated gif. In addition to the above animation I present the below photos for today's Photogeddon. The photos are from yesterday, as I have way too much going on today to be able to take new photos... I have about 1000 portraits to process from yesterday as well as I am going back to collect my personal affects from my employer at 5:30 PM and I have to make some time for my wife who I know if feeling a bit like a widow. After all of the that I still have a new website to finish putting together... all in a day's work, right? I love being this busy. :)

Kevin Kubota

Curves


Moon

55 Chevy

Cherry 375hp 55 Chevy

Sunday, October 17, 2010

Photogeddon - Day 21

What an amazing day. Michael, Nathan, Chris and I went to Bend today to help Kevin Kubota with a community giving event he puts on every year. What a blast we had. Here are some shots from our road trip... I will post more shots from our trip tomorrow; after I get some rest. A 226 mile round trip and 6 hour portrait shoot has left me all but brain dead.

Outside of Bend


Michael Conkey

Nathan Smith

Christopher David

On the Road Again

Monday, October 11, 2010

Free Lightroom Preset: CMS Eyes Enhance Local Presets

Today's Lightroom presets are for the local adjustment brush inside of Lightroom. One of the powerful features of Lightroom is the Local adjustment brush. This gives the photographer the power to make specific changes to certain parts of the photograph without affecting the entire image.
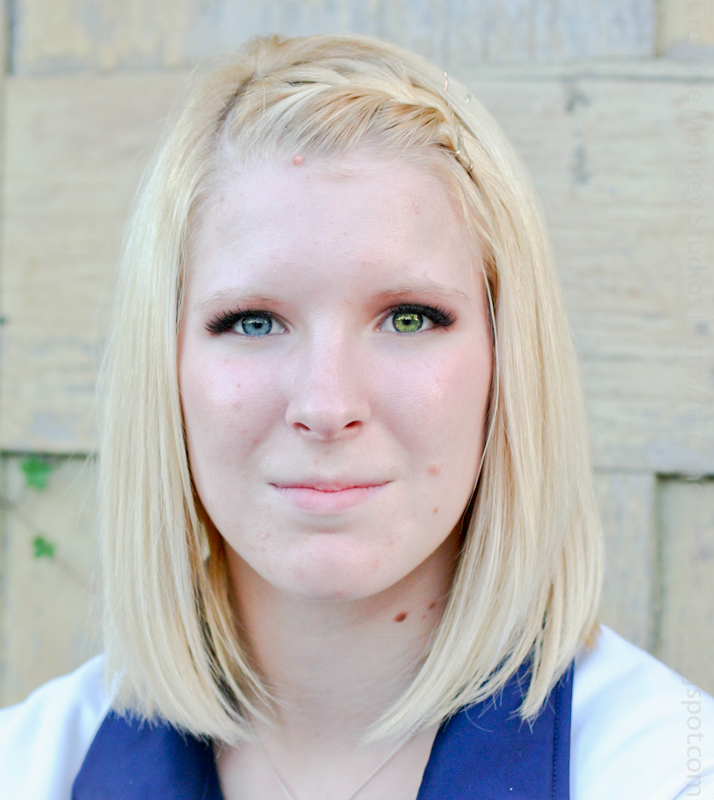
In the image on the left I have already made my adjustments to everything in the basic tools (exposure, brightness, etc) as well as adjusted the tone curve.

Making these global adjustments before making local adjustments is critical because adjusting these after making local adjustments will adjust the entire image, including the local adjustment areas. So when you have your local adjustments just right, any global adjustments you make after can create a huge mess of your local adjustments.
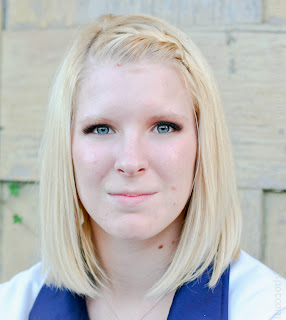


Eye Whitening
 The first preset is the CMS-Eyes – Whiten preset. This local adjustment brush preset is used to whiten and brighten the whites of the eyes. Two secrets to applying this adjustment is to turn on Auto Mask, set the feather slider to 35 and zoom in at least 1:1, 3:1 if you need to have a little more control.


Then paint with the brush in the white areas of the eyes. The whites of the eyes will soften a little and whiten and brighten up. If you look at the before photo (above) and the after photo (right) you can see a subtle difference. The important thing to remember is that the eyes need to be properly exposed to begin with for this brush preset to be most effective.
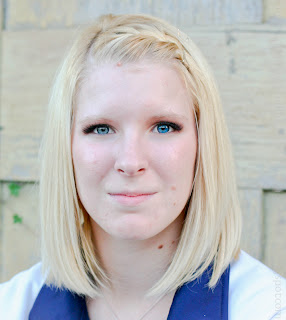


Dark Blue Eyes
 The CMS-Iris Enhance - DK Blue local adjustment brush preset is used to enhance blue eyes, to make the blue pop with a darker tint.


It can also be used to change the color of the subject’s eyes.

The photo on the right has the effect painted onto one eye and not the other to give a great representation of the effect.

Also applied here is the CMS-Eyes – Whiten preset, mentioned above to give you a glimpse of the combined impact of the two effects. Apply this brush to the iris of the eye only.
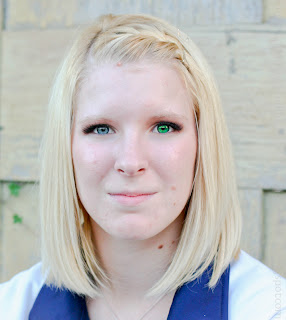


Dark Green Eyes
 The CMS-Iris Enhance - DK Green local adjustment brush preset is used to enhance greenish or blue eyes, to make the green pop with a darker tint.


It can also be used to change the color of the subject’s eyes.

The photo on the right has the effect painted onto one eye and not the other to give a great representation of the effect.

Also applied here is the CMS-Eyes – Whiten preset, mentioned above to give you a glimpse of the combined impact of the two effects. Apply this brush to the iris of the eye only.
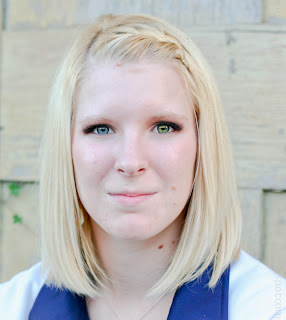


Hazel Eyes
 The CMS-Iris Enhance - Hazel local adjustment brush preset is used to enhance green to hazel, to make the hazel pop with a lighter tint.


It can also be used to change the color of the subject’s eyes.

The photo on the right has the effect painted onto one eye and not the other to give a great representation of the effect.

Also applied here is the CMS-Eyes – Whiten preset, mentioned above to give you a glimpse of the combined impact of the two effects. Apply this brush to the iris of the eye only.
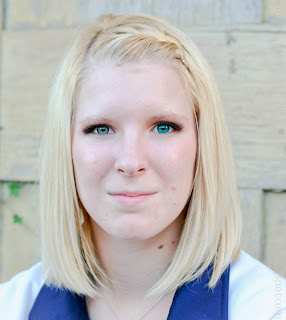


Light Blue Eyes
 The CMS-Iris Enhance - LtBlue local adjustment brush preset is used to enhance grey to blue, to make the blue pop with a lighter tint.


It can also be used to change the color of the subject’s eyes.

The photo on the right has the effect painted onto one eye and not the other to give a great representation of the effect.

Also applied here is the CMS-Eyes – Whiten preset, mentioned above to give you a glimpse of the combined impact of the two effects. Apply this brush to the iris of the eye only.
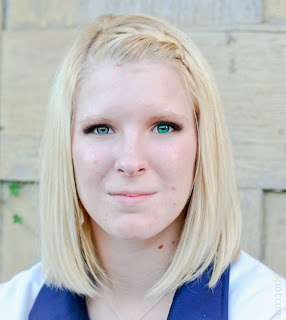


Light Green Eyes
 The CMS-Iris Enhance - LtGreen local adjustment brush preset is used to enhance green to blue, to make the green pop with a lighter tint.


It can also be used to change the color of the subject’s eyes.

The photo on the right has the effect painted onto one eye and not the other to give a great representation of the effect.

Also applied here is the CMS-Eyes – Whiten preset, mentioned above to give you a glimpse of the combined impact of the two effects. Apply this brush to the iris of the eye only.


No Color Eyes Enhanced
 The photo on the right has the effect painted onto one eye and not the other to give a great representation of the effect.


Also applied here is the CMS-Eyes – Whiten preset, mentioned above to give you a glimpse of the combined impact of the two effects. Apply this brush to the iris of the eye only.

Download Entire Set Here

To install the preset, copy the file in the zip (xxx.lrtemplate) to your Local Adjustment Presets folder on your computer. If you don't know where to find this folder, open Lightroom. Click on Edit menu and select Preferences. Click on the Presets tab and click the Show Lightroom Presets Folder... button.