In the image on the left I have already made my adjustments to everything in the basic tools (exposure, brightness, etc) as well as adjusted the tone curve.
Making these global adjustments before making local adjustments is critical because adjusting these after making local adjustments will adjust the entire image, including the local adjustment areas. So when you have your local adjustments just right, any global adjustments you make after can create a huge mess of your local adjustments.
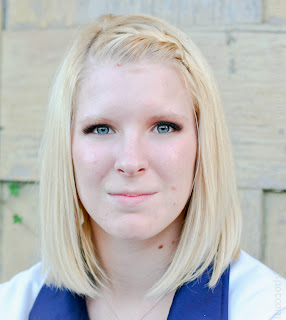 |
| Eye Whitening |
Then paint with the brush in the white areas of the eyes. The whites of the eyes will soften a little and whiten and brighten up. If you look at the before photo (above) and the after photo (right) you can see a subtle difference. The important thing to remember is that the eyes need to be properly exposed to begin with for this brush preset to be most effective.
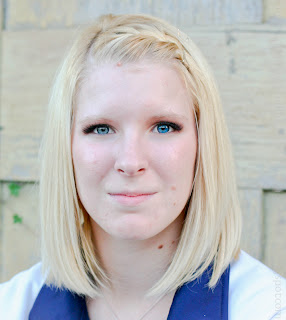 |
| Dark Blue Eyes |
It can also be used to change the color of the subject’s eyes.
The photo on the right has the effect painted onto one eye and not the other to give a great representation of the effect.
Also applied here is the CMS-Eyes – Whiten preset, mentioned above to give you a glimpse of the combined impact of the two effects. Apply this brush to the iris of the eye only.
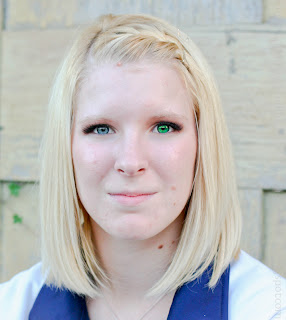 |
| Dark Green Eyes |
It can also be used to change the color of the subject’s eyes.
The photo on the right has the effect painted onto one eye and not the other to give a great representation of the effect.
Also applied here is the CMS-Eyes – Whiten preset, mentioned above to give you a glimpse of the combined impact of the two effects. Apply this brush to the iris of the eye only.
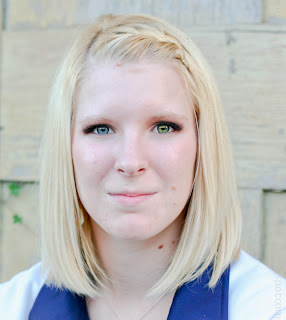 |
| Hazel Eyes |
It can also be used to change the color of the subject’s eyes.
The photo on the right has the effect painted onto one eye and not the other to give a great representation of the effect.
Also applied here is the CMS-Eyes – Whiten preset, mentioned above to give you a glimpse of the combined impact of the two effects. Apply this brush to the iris of the eye only.
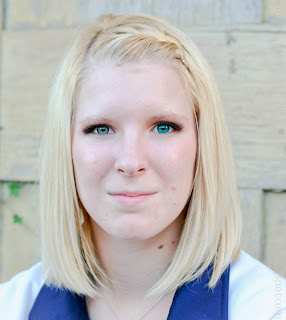 |
| Light Blue Eyes |
It can also be used to change the color of the subject’s eyes.
The photo on the right has the effect painted onto one eye and not the other to give a great representation of the effect.
Also applied here is the CMS-Eyes – Whiten preset, mentioned above to give you a glimpse of the combined impact of the two effects. Apply this brush to the iris of the eye only.
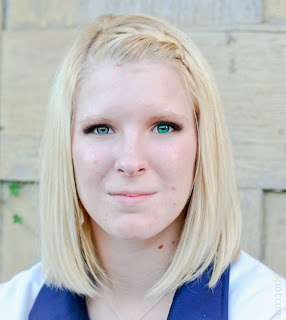 |
| Light Green Eyes |
It can also be used to change the color of the subject’s eyes.
The photo on the right has the effect painted onto one eye and not the other to give a great representation of the effect.
Also applied here is the CMS-Eyes – Whiten preset, mentioned above to give you a glimpse of the combined impact of the two effects. Apply this brush to the iris of the eye only.
 |
| No Color Eyes Enhanced |
Also applied here is the CMS-Eyes – Whiten preset, mentioned above to give you a glimpse of the combined impact of the two effects. Apply this brush to the iris of the eye only.
Download Entire Set Here
To install the preset, copy the file in the zip (xxx.lrtemplate) to your Local Adjustment Presets folder on your computer. If you don't know where to find this folder, open Lightroom. Click on Edit menu and select Preferences. Click on the Presets tab and click the Show Lightroom Presets Folder... button.

No comments:
Post a Comment